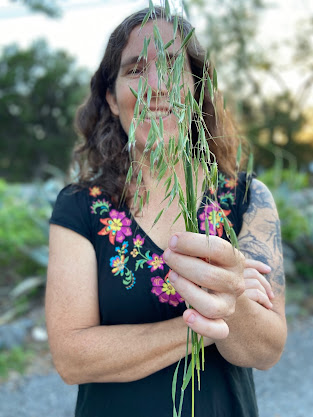
Wild Edible Texas
Tuesday, May 15, 2012
Prickly Pear Flowers
Keep an eye out for these gorgeous, succulent treats! They're crunchy, colorful, nutritious and tasty on top of any salad or sandwich. Pluck the yellow or orange prickly pear flower petals and eat them raw or lightly sauteed.
Monday, May 7, 2012
Wild Blackberries
We're at the tail-end of wild blackberry and dewberry season out here in the Texas Hill Country, but there still might be a few of these deliciously tart little gems out in the fields. Watch out for chiggers and snakes and then harvest away!
| The kids enjoy eating the berries straight out of our harvest bag |
If you manage to harvest enough to freeze or use in cooking, here's a quick and easy way to enjoy them baked:
Wild Blackberry Crostatas
| Once baked, the crostatas are best served warm with a scoop of vanilla ice cream on top |
2 c flour
3/4 c sugar
1/4 tsp. salt
2 sticks cold, unsalted butter
3 to 4 Tbsp. ice water or heavy cream
1 c blackberries
Preheat the oven to 425ยบ and line a baking sheet with parchment paper. If you don't have parchment, you can use foil or a nonstick pan but be sure you coat the pan with a nonstick spray or rub it down with butter.
Combine the flour, 1/2 c of the sugar and salt and whisk together. Cut the butter into small pieces and cut in to the flour mixture with a pastry blender or a food processor until the butter chunks are the size of peas. Slowly add 1 tablespoon of liquid at a time and stir or pulse until the dough comes together. Once you can push the dough into a ball, wrap it in plastic and let it rest in your fridge for at least 30 minutes or up to 3 days.
Once it has rested and the butter in the mixture has firmed up, remove it from the fridge and divide the dough into 6 equal pieces. Sprinkle your counter with flour and roll or press each piece out into an imperfect round (see picture), about 1/8 inch thick, and set on the baking sheet. Spoon several berries into the center of each round and pull the dough up around the berries to form a triangle or square shaped pastry, pinching it at the corners to make sure it doesn't unravel in the oven. Place the whole pan in the fridge for another 30 minutes to allow the dough the rest again.
Remove from the fridge and coat the top of each crostata with egg wash if desired (to make it turn extra golden brown in the oven) and sprinkle the extra sugar over the top. Place the crostatas in the preheated oven and bake for 15 to 25 minutes until brown at the edges. Don't be surprised if some of the blackberry juices spill over during cooking - it will simply add to the rustic look of a crostata! Let cool on a rack and then serve warm. Or, you can store them in the fridge and warm them up in an oven when you're ready to serve.
Thursday, April 26, 2012
Prickly Pears
| Opuntia engelmannii - Our most common prickly pear cactus species here in Central Texas |
Seen any of the new growth on our prickly pears lately? 'Tis the season for many wild edibles, but these young, tender pads are one of the most substantial, nutritious and prolific vegetables available right now. Here's one way to harvest and process them:
1. Put on some very thick, sturdy gloves.
2. While holding one pad with your gloved hand, cut each new pad (new ones have tiny green leaves coming out of the areoles, along with thorns) off just above where it has sprouted off an older pad.
3. While still holding it, trim off the outer edge all the way around to eliminate the many tiny thorns that congregate along the margins of the pad.
4. While still holding the pad, take a knife and scrape off the leaves and thorns from the surface of the pad.
5. Throw the partially cleaned pad in your harvest bucket or bag and proceed to the next pad.
6. Once you've collected all that you need, return to your kitchen and wash the pads under a steady stream of water. At this point, you might want to replace your thorny outdoor gloves with some equally sturdy indoor gloves because the pads will still have some tiny thorns attached. Beware, they hurt!
7. Once you've cleaned off the pads with water (it's OK if you didn't remove every single tiny thorn) slice them and cook them up or freeze them for later use.
| These pads were harvested out on our farm. After slicing them, I slid them into a freezer bag and stuck them in the freezer to use for tacos later. |
* I will publish more detailed instructions and recipes soon!
Monday, April 23, 2012
Agarita Harvest
| The kids inspect the agarita bush |
We harvested agarita berries on Sunday at our farm near Wimberley, Texas. Chris snapped some pictures of the event:
| Joe Henry and Garner with the wagon full of tools |
I find it easiest to harvest by limb and section, but there are several ways to get these sweet-tart little berries off the plant. I lay my container (in the above picture, it is a plastic lid from a storage bin) on the ground under a few limbs. I'll then hold the end of each limb and beat it with a stick or wooden spoon. The ripe berries will fall onto the container along with some debris.
| Whacking the limb over the container |
Once I've moved my containers around to all parts of the bush and I feel like I've whacked enough limbs, I'll begin to sort out the berries (or red jewels, as my kids call them) from the debris.
| Baskets can also be used for the harvest |
| Pulling the good berries from the blue bin and placing them in the yellow bin |
After I sort out the good berries from the bad, I then process them or freeze them for later. Here are a few more shots from our agarita harvest:
| My helpers |
| Garner preferred to harvest the berries by hand and eat every other one |
| Bringing in the Harvest |
Wednesday, April 18, 2012
Agaritas
| Berberis trifoliolata - the most common species found in Texas |
Agaritas are ripe here in Central Texas, y'all! Quick, get out there and harvest them before the birds eat them all. Eat the red-ripe berries raw, seeds and all, or extract their juices to make wine, jelly, sauces, meat glazes and other creative dishes.
*
The story of grannies in long skirts and boots, beating agarita bushes with sticks to release the berries is commonly told throughout Texas. Indeed, the agarita berry is plentiful in Central, South and West Texas and is sweetly tart, making it an excellent candidate for nibbling trailside or collecting in large quantities for sauces, mixed drinks, juices, jellies, and wines.
Agarita blooms are one of the first sweet smells to enchant the hiker in early spring. Follow your nose to the tiny yellow flowers covering a small shrub distinguished by its tough, evergreen leaves with extra firm, spiny edges. Remember the shrub’s location, usually found on a fenceline or at the edge of the woods, and return in a few weeks to collect the tiny berries that ripen to a deep red.
When agarita berries are ripe, they can be plucked from the bush and eaten raw though the tender-fingered should beware. Harvesting the berries bare-handed is tricky. Large quantities of the berries can be collected by laying a sheet, kiddie pool, box or other container (preferably wide, rigid, and lipped) underneath the bush. Hold one or two limbs at a time and gently shake or whack it with a stick so that the berries fall into the container - ripe ones will fall easily. Once collected, the stems, leaves and other plant debris should be removed by winnowing in front of a fan, picking through by hand (again, not for the tender-fingered) or sifting through on a counter like you would sift through dried beans for rocks (this method was actually recommended by a Texas granny.) Washing and sifting can be done simultaneously by placing the harvest in a basin of water and then gently running your hands through the mixture - most of the debris will stick to your hand and the dirt will fall to the bottom of the basin. You can rinse your hands off and repeat as needed. When all the debris is removed, dry the berries on a towel.
Once the berries are washed, you can freeze them or prepare them. To extract their juices, cover the berries with hot water and let them soak for at least 30 minutes. Mash them with a potato masher and then pour the mixture through a jelly bag or several layers of cheesecloth. The berries can also be blended with a bit of water, and then strained or they can be juiced using a standard juicer. Do not boil the berries since this will cause berberine, a bitter alkaloid, to be released. Fresh agaritas can be stored in the refrigerator for a day or two but are best used fresh or frozen for processing later. Agarita juice can also be frozen for up to a year.
Agarita Jelly Recipe
Makes 2 pints
Slightly tart and perfectly sweet, the soft-red colored agarita jelly is a Texas treat on everything from biscuits to peanut butter and jelly sandwiches.
4 c agaritas
1 package of pectin
1 Tbsp. lemon juice
¾ c sugar per cup of agarita juice
Place agaritas in a bowl or pan and pour hot water over the berries just until covered. Let sit for 30 minutes then mash vigorously with a potato masher to release the juices. Strain through cheesecloth or a jelly bag and squeeze thoroughly to extract all of the juices. Measure and pour the juice into a pot and add the pectin and lemon juice. Bring to a boil then add ¾ c sugar per cup of agarita juice and stir constantly. Bring to a boil for 2-4 minutes. Test the liquid to see if it will gel by taking a spoonful out, letting it cool, and then pouring it back in. If some of liquid runs together into a sticky sheet, it’s ready to gel. Pour the hot liquid into sterilized jars, place the caps and rings on tightly and boil in a hot water bath for 10 minutes. Note: This recipe does not make a lot of jelly so if you plan on eating it within a few weeks, you don't need to can it and process in a hot water bath. Simply put in in airtight containers and store it in your refrigerator.
Labels:
agaritas
Subscribe to:
Posts (Atom)